Get To Know Us. Again.

We’re Just
Not The Same

Not the same as big box stores, not
the same as we were before.

Not the same as big box stores,
not the same as we were before.

Woman with clipboard next to a variety of lawn tools

We’ve
Changed.
Our Name
Hasn’t.

We’ve Changed.
Our name Hasn’t.

We have a new look. We have a new spirit. We’re rededicated to offering the finest in home renovation in our fully stocked hardware store. With top-notch designers for kitchens and bathrooms. An enthusiastic staff for windows, doors and more. Welcome to a whole new chapter in the Piscitello’s Home Center history.

Home Is Where Our Heart Is.

You’re our friends and neighbors. We care about you and our community.

Our staff is inspired to always work at their personal best — so that you receive the best in personalized service. Your home is in good hands with us; on that you have our heartfelt promise.

Dave and Lisa Colver, Owners
- Dave and Lisa Colver, Owners

"We are absolutely in love with our kitchen! With the help of Piscitello's we were able to bring our vision to life and create our dream kitchen. The layout and design are perfect. There is not a single thing we would change. We also felt we received a great value with the Wolf Hanover Grey cabinets. Top-notch service!"

AMANDA

Related projects & ideas

types of screws

Types of Screws

3 min read
types of screws

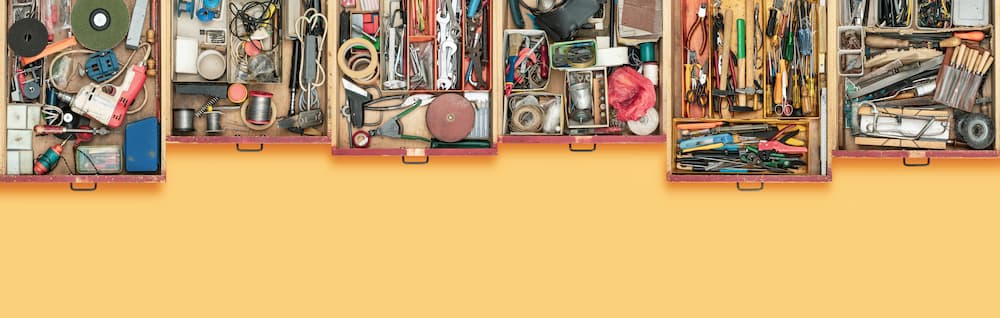
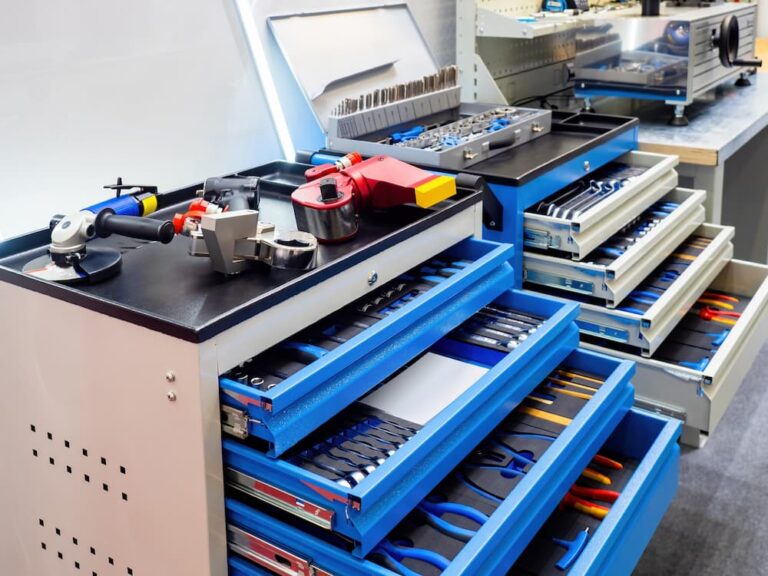
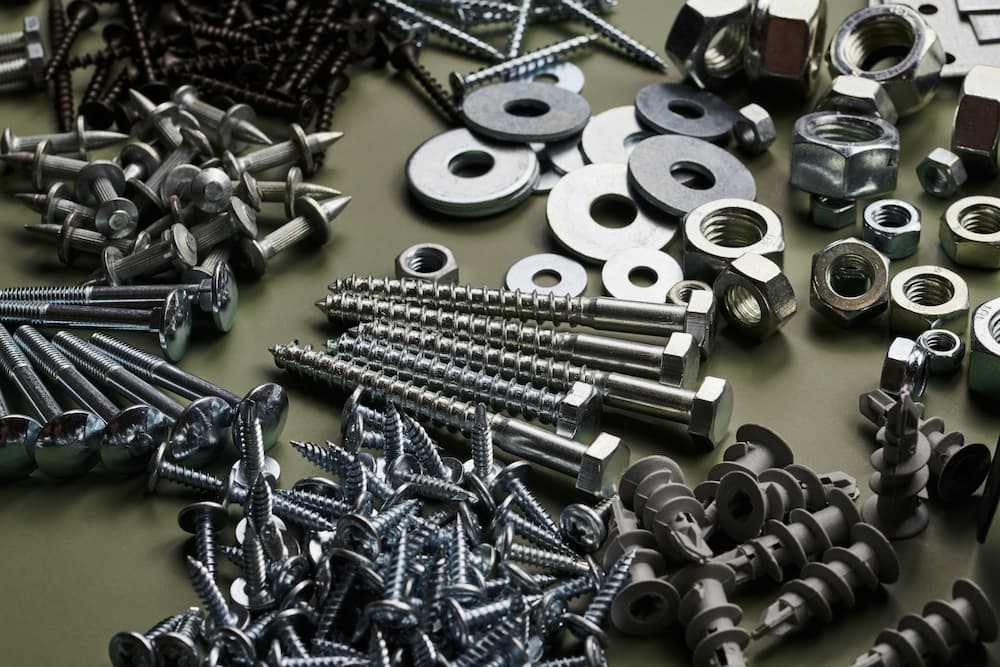
Screws are a fundamental part of basically any construction project, despite their ubiquity, though not that many people pay attention to the specifics. Different materials require different types of screws to achieve the best outcomes. Before you start on your next DIY project, learn more about the different types of screws and what they can do for you.
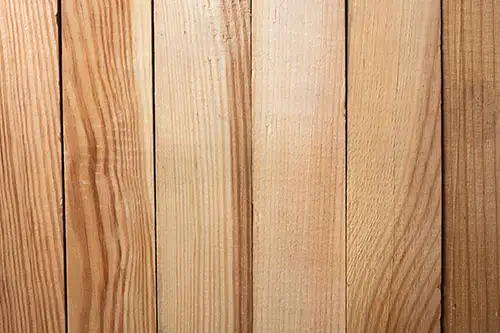
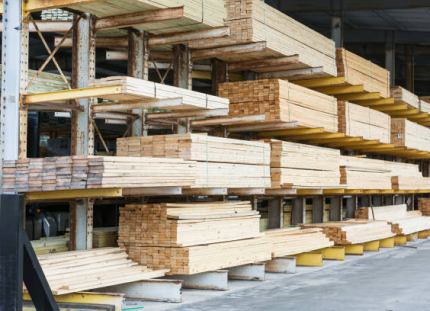
Wood Screws

Wood screws, as implied by their name, are typically used for wood. But what makes them suitable for this material? Traditionally, wood screws have a sharp, tapered point to pierce through wood with ease, eliminating the need for a pilot hole in softer wood types. They come with partial threading, where the upper part is unthreaded, and the lower part near the point is threaded. This design allows the screw to grip the lower piece of wood securely while pulling the upper piece tight against it, creating a firm connection.

Wood screws are typically made of brass, bronze, or steel and are available in a variety of sizes and lengths. The presence of a countersunk head allows them to be installed flush with or below the surface of the wood for a neat finish.

Metal Screws

Metal screws, often referred to as machine screws, are designed to fasten metal to metal. Unlike wood screws, they are fully threaded from the head to the point and have a flat end. This design makes them ideal for providing a strong bond between metal parts. They also usually require pre-drilled pilot holes.

Metal screws are commonly made from stainless steel, aluminum, or brass to avoid any kind of corrosion. You should always use metal screws that match the type of metal you’re working with, as using a dissimilar metal can lead to galvanic corrosion.

Concrete and Masonry Screws

Concrete and masonry screws are perfect for fastening objects to concrete, brick, or blocks. The main feature of these screws is their high-strength, abrasion-resistant steel construction and a notched thread at the tip to help clear debris during installation. These screws require pre-drilled holes and can be used with plugs if necessary for extra holding power.

Drywall Screws

Primarily designed for attaching drywall to wood or metal studs, drywall screws have a bugle head to prevent tearing of the material surface, a sharp point for easy penetration. They are fully threaded for good holding power. They are typically made from hardened steel and coated with black phosphate to resist corrosion.

Self-Drilling Screws

Self-drilling screws, also known as Tek screws, come equipped with a drill bit end. They are specially designed to eliminate the need for a pre-drilled hole, allowing you to drill the hole with the screw in one action. Their threads run the entire length of the screw from the tip to the head, providing excellent holding power. They are ideal for fastening metal sheets together.

Specialty Screws

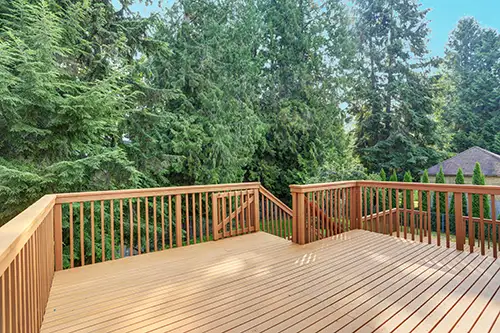
Specialty screws include deck screws, particle board screws, and many others designed for specific applications. Deck screws, for instance, are coated for corrosion resistance and designed to fasten wood or composite decking to the wood frame. Particle board screws are designed with a narrower thread and a sharp point for easier penetration into particle board, MDF, and other engineered lumber materials.

Choosing the Right Screw for the Job

You have to choose the right screw for your project’s longevity and safety. Factors to consider include the materials you are working with, the predicted load on the screw, and the environmental conditions the screw will face. Always match the screw’s metal to your material, consider using longer or wider screws for heavier loads, and opt for coated screws in corrosive environments.

Find the Screw You Need and More at Piscitello’s Home Center

At Piscitello’s Home Center, we stock a wide variety of screws to cater to your needs. From wood screws to metal screws to specialty screws and more, we have exactly what you need to make your DIY project smoother and safer. For all your screw needs, visit us online or in-store and receive professional advice on choosing the right screw for your project.
 

Image Source: Ivan_Kislitsin / Shutterstock

diy dividers for drawers

DIY Dividers for Drawers

3 min read
diy dividers for drawers

Ever feel like your drawers are black holes that swallow socks and spatulas whole? Or perhaps you are tired of rummaging through cluttered drawers, searching endlessly for that one item you need. You’re not alone. For organizer enthusiasts, drawer dividers are your secret weapon in the fight against clutter.

Not only are they space-saving superstars, but they’re also surprisingly simple and budget-friendly to make yourself. This guide provides tips on creating personalized wooden drawer organizers that cater to your specific needs, from kitchen chaos to wardrobe woes and office mayhem.


Where to Use DIY Drawer Organizers in the Home


Drawer organizers aren’t just for silverware anymore. These versatile dividers can streamline organization throughout your home. You can build custom dividers for your kitchen cabinets to neatly store utensils, linens, and even tea towels.

Expandable dividers are a lifesaver in compact drawers, as they maximize space without sacrificing functionality.

  • For clothing storage, prevent topsy-turvy drawers with organizers that keep garments neatly separated and easily accessible.
  • In the office, pens, pencils, and paperclips often become an entangled mess. Drawer dividers bring order to the chaos by keeping all your desk essentials within easy reach.
  • Tired of “hunting” for makeup brushes or toiletries? Wooden dividers can create designated zones for cosmetics, hygiene products, and anything else that tends to get lost in the bathroom drawer abyss.
  • Drawer dividers are a game-changer for sock drawers. Say goodbye to mismatched pairs and tangled chaos. Separate compartments for socks, scarves, or undergarments will transform your mornings.

How to Make DIY Wooden Drawer Organizers


Why opt for store-bought when you can easily fashion your own custom dividers without breaking the bank? DIY drawer organizers offer a cost-effective solution to clutter, plus it’s a beginner-friendly project that requires a few tools and basic woodworking skills. Feeling inspired? Let’s get started.

For your DIY drawer organizer arsenal, you’ll need:

  • Unfinished wood boards, for example, poplar. Choose a thickness that suits your needs and drawer depth.
  • Wood glue (Loctite clear dry formula is recommended)
  • Measuring tape for accurate cuts
  • Miter saw or handsaw for precise cuts
  • Square tool for ensuring straight lines
  • Pencil for marking your measurements

Remember, you may need a drill and screws if you need to connect multiple pieces of the divider for stability. While unnecessary, you can line finished drawers and dividers using shelf liner, regular or peel-and-stick wallpaper, or contact paper. Once you’ve gathered all the necessary materials and tools, measure your drawer dimensions so you can tailor dividers to the exact dimensions of your drawers.

Design the drawer’s layout by grouping its contents by function or size. Then, measure both the drawer’s interior and the items you plan to store for perfectly sized dividers. Next, cut the boards using a miter saw or handsaw, sizing them according to your compartments. Assemble the dividers using glue and square tools, but make sure they are completely dry before placing them back in your drawers.


Material of Choice


Several options are available regarding the material you can use: plastic, acrylic, bamboo, metal, or wood. Wooden drawer organizers offer durability and a natural aesthetic, thus making them ideal for most applications. For environmentally friendly organizing solutions, consider chipboard, as it can be effortlessly cut and assembled to offer flexibility in design and functionality. Kraft board is also suitable for building drawer dividers due to its sturdiness and ease of customization.


Create Customized Storage Solutions with Piscitello’s Home Center


Piscitello’s Home Center is a family-owned establishment with over six decades of expertise in the home improvement sector. We’re dedicated to offering quality products and friendly service, including helping our customers to reimagine, revamp, and reinvigorate their spaces.

Piscitello’s Home Center is your one-stop shop for all things home improvement, from kitchen and bath renovations to hardware, lumber, and expert advice. Contact our help center and speak to our friendly, knowledgeable staff about your upcoming DIY project.

tool storage ideas

Tool Storage Ideas

3 min read
tool storage ideas

Storing tools can be a challenge, especially if you want to keep them organized and the clutter out of your garage. With an array of screwdriver heads, drill bits, and bulky miter saws, finding a single storage solution for all your needs can be tricky. Using the right combination of boxes, chests, and cabinets can go a long way in organizing and storing your tools. At Piscitello’s Home Center, our team is here to help you explore different tool storage ideas and get the storage solutions you need.

Tool Cabinets and Tool Chests

Many tools are big, bulky, and awkwardly shaped. Power tool storage, in particular, is a complex challenge that needs oversized cabinets and tool chests to manage. Tool chests are durable boxes that come in a wide range of standardized sizes to accommodate drills, saws, and power tools. Some options even include compartments for bits, extra blades, and other useful hardware. Chests can sit in your garage or closet and can even be tied onto a truck bed wherever you need your tools.

Tool cabinets are even larger. They can reach chest height or even taller – and include shelves, drawers, compartments, and divided storage spaces for differently-sized tools. You can choose from a wide selection of cabinets or chests based on the storage you need.

Portable Tool Boxes

Having a couple of different toolboxes is a handy solution. We recommend having at least two: a basic tool kit that you keep inside your home for storing screwdrivers, a hammer, and other simple tools, and a larger toolbox in your garage. When you have a small collection of tools in your kitchen or a handy closet, you don’t have to keep going in and out of the garage for simple projects like hanging photos or fixing a loose screw.

The larger garage toolbox can hold tools you use less frequently but may still need to transport in and out of the house on occasion.

Rolling and Stackable Tool Storage

Modular toolboxes are also a handy choice if you have a lot of tools you want to keep well-organized. There are two major types of rolling and stackable storage:

    • Rolling Toolboxes: These solution solutions look a bit like luggage. They each have a stack of boxes ranging from big on the bottom to small on top, and they affix to a frame with a handle and wheels. You can move this very easily without sacrificing organization.

    • Rolling cabinets are much larger and sit on a frame with four wheels. The cabinet has multiple drawers of different sizes and will often have a horizontal bar for hanging tools or positioning the rolling cabinet. This is ideal if you generally keep the tools in a garage or workshop but want to be able to reposition them for more convenience.

Other Tool Storage and Organization Ideas

If you’re looking for more creative tool storage ideas, plenty of other options exist for different use cases. Consider:

    • A tiny toolkit to keep in your car

    • Pegboard walls and hooks or hanging baskets so you can organize all your tools across a big vertical surface, giving you complete visibility

    • Open shelving for oversized tools and small appliances like shop vacs

Trust Piscitello’s Home Center for all Your Tool Storage Needs

There is no end to the storage options you can use to organize and store tools around your home, truck, or business property. Piscitello’s Home Center offers remodeling and renovation solutions, so your tools always have room. Reach out today to learn more.

Image Source: FOTOGRIN / Shutterstock

Building Pantry Shelves

Building Pantry Shelves DIY

3 min read
Building Pantry Shelves

Building Pantry Shelves DIY

Every homeowner knows that there can never be enough storage space. That’s why pantries with a convenient shelving system are always in demand. If your pantry requires revamping to suit your family’s needs, you can turn it into a fun DIY project.

At Piscitello’s Home Center, we have the materials you need to start the home improvement project of your choice. Before you come to our location in Easton, PA, to get the materials you need, let’s take a closer look at how to build pantry shelves on your own.

Before You Begin

Before diving into the project, you have to take several steps to prepare. While building pantry shelves doesn’t require significant expertise, it’s not always a straightforward DIY task. Here is where you start:

Lay Out Your Pantry 

Do you already have the pantry of your dreams in mind? Now is the time to make careful measurements to figure out where the shelves will go in reality.

Think about which items you plan to put on these shelves. You can even measure boxes, pots, and equipment for appropriate sizing and spacing.

Locate Studs 

Anchoring your shelves to studs provides a secure base and prevents them from collapsing. Studs can also determine the location of the shelves.

To locate studs, you can use a stud finder, which is a handheld device that detects the presence of wooden studs behind the wall. If you know what to look for, you can tap the wall lightly and listen for a solid, hollow sound, indicating the presence of a stud. Once you find the studs, mark their positions.

Building Pantry Shelves 

To build pantry shelves, you will need the following materials and tools:

Building Your Pantry Shelves

Step #1: Cut the Boards

Transfer previously made shelf measurements onto your prefinished shelving or plywood boards. Using a saw, cut the boards to the desired size.

Step #2: Attach Brackets 

Position the brackets along the marked stud locations on the wall. Use a level to ensure they are straight. Mark the screw locations with a pencil and pre-drill holes into the studs. Next, attach the brackets securely to the wall with screws.

Step #3: Install the Shelves

Place the shelves onto the brackets. Make sure they fit snugly, and use the screws to attach them to the brackets.

Step #4: Add Support

If you plan to store heavy items on your pantry shelves, you may want to give them additional support. You can do this by attaching L-shaped brackets underneath each shelf near the front and back edges. It’s always a good idea to give your shelves some extra support.

Step #5: Check for Levelness

Use a level to double-check that all the shelves are in the right place. Make any necessary adjustments by loosening or tightening the screws.

Step #6: Test the Stability

Before putting any items on the newly-built shelves, shake them gently. If you notice any wobbling or instability, reinforce the brackets, add more support and/or screws.

Once you finish installing the shelves, you can spice it up with a little color. Consider painting the shelves or staining them for some extra integrity.

Experience the Difference: Piscitello’s Home Center for Your Home Improvement Needs

The key to building pantry shelves is our one-stop home improvement store. At Piscitello’s Home Center, we know how important it is to find everything you need for your project in one place.

That’s why we invite you to our Easton, PA, store to get all the hardware and lumber you need to build the pantry of your dreams. Contact our experts today to find out how we can help you with your DIY home improvement plans.


Image Source: VH-Studio / Shutterstock

Kiln-Dried Wood

Why Kiln-Dried Wood is Crucial for Indoor Projects

3 min read

Kiln-Dried Wood

Why Kiln-Dried Wood is Crucial for Indoor Projects

This post is about a special kind of wood called “kiln-dried wood” and why it’s super important for indoor projects. Whether building something cool or just curious, this blog post will help you understand why kiln-dried wood is a big deal.


What’s Kiln-Dried Wood?

First things first, what’s kiln-dried wood? Well, it’s like regular wood, but it goes through a special drying process. Imagine putting a wet sponge in the sun to dry it out. Kiln-dried wood is kinda like that sponge but in a big oven called a “kiln.” This process removes the extra moisture from the wood, making it dry and ready for action.

Why Is Kiln-Dried Wood Important?

Now, let’s talk about why kiln-dried wood is so crucial for indoor projects:

Strong and Steady: Kiln-dried wood is like the superhero of wood. It’s super strong and doesn’t bend, warp, or crack easily. Imagine if you’re building a table or chair – you want it to stay strong and last a long time. Kiln-dried wood helps with that!

Bugs and Mold Beware: Wet wood can attract icky bugs and mold. Kiln-dried wood makes sure that bugs and mold don’t want to hang out in your indoor projects. It’s like a “No bugs allowed” sign for your wood!

Easy to Work With: When you’re building or making cool stuff, you want the wood to be easy to cut, shape, and paint. Kiln-dried wood is your best buddy for this because it won’t splinter or crack easily. It’s like working with a friend who helps you do your best.

Stays the Same: Kiln-dried wood is consistent, which means it’s the same all over. This helps your project stay strong and look great. No surprises or weird changes over time.

No Shrinking Surprises: Sometimes, wood that’s not kiln-dried can shrink as it dries out in your home. This can create gaps and problems in your project. Kiln-dried wood won’t do that because it’s already as dry as it should be.

Indoor Projects That Need Kiln-Dried Wood

Now that you know why kiln-dried wood is awesome, let’s talk about the indoor projects that need it:

Furniture: Making tables, chairs, or cabinets for your home? Kiln-dried wood is perfect for these projects because it’s strong and won’t bend or break easily.

Flooring: Wood flooring can make your home look amazing, but it needs to be made from kiln-dried wood. That way, it won’t warp or bend after it’s put in your house.

Doors and Windows: Your doors and windows need to fit perfectly and stay strong. Kiln-dried wood helps with that, so you can easily open and close them.

Trim and Molding: Those pretty details around doors and windows are often made from kiln-dried wood. It stays the same and looks great for a long time.

Shelving: Want to build shelves to hold your books, toys, or decorations? Kiln-dried wood is the right choice because your shelves will stay strong and look good.

In Conclusion, Kiln-dried wood is like the superhero sidekick you need for your indoor projects. It’s strong, keeps bugs and mold away, is easy to work with, stays the same, and doesn’t shrink unexpectedly. When you choose kiln-dried wood, you’re making sure your projects will last a long time and look fantastic.

Now, you’re more educated on why kiln-dried wood is crucial for indoor projects. So, have fun building and crafting with kiln-dried wood – your projects will be great!

Chosing lumber for deck

Choosing the Right Lumber for Decking and Outdoor Projects

3 min read

Have you ever considered building a cool backyard deck or treehouse? To make your outdoor projects awesome, you need the right kind of wood. It’s called “lumber,” and in this blog post, we will learn all about picking the perfect lumber for decking and outdoor projects. Let’s dive in!


What’s Lumber?

First things first, what’s lumber? Lumber is just a fancy word for wood used for building stuff. It’s like the building blocks of outdoor projects. But not all lumber is the same, and you’ll want to choose the right kind for what you want to create.

Why Choosing the Right Lumber Matters

Choosing the right lumber is important for a few good reasons:

  • Durability: You want your outdoor projects to last long, right? The right lumber will be strong and tough, so your creations stay standing, even in rain or shine.
  • Safety: Safety is a big deal! The right lumber won’t splinter easily, so you won’t get little wood pieces in your hands when you touch it.
  • Looks Matter: The right lumber will make your outdoor project look great. It won’t get all warped or ugly over time.
  • Maintenance: You don’t want to spend all your time fixing and taking care of your outdoor project. The right lumber will need less work to stay awesome.

Different Types of Lumber

Okay, now that we know why choosing the right lumber is a big deal, let’s explore the different types of lumber you can use for your outdoor projects:

Pressure-Treated Lumber: This lumber is like the superhero of outdoor projects. It’s strong and can stand up to the weather. Pressure-treated wood is great for decks, fences, and even playsets. 

Composite Decking: This isn’t precisely wood, but it’s worth mentioning. Composite decking is made from a mix of wood and plastic. It’s low-maintenance, which means you won’t have to work too hard to keep it looking nice. It’s perfect for decks and porches.

Choosing the Right Lumber

Picking the right lumber for your project is a bit like choosing the right ingredients for your favorite recipe. You need to think about what you’re making and what you want from it. 

Here are some things to consider:

Where It Will Be: Think about where your project will be. Is it in the full sun, or will it get a lot of rain? Different woods work better in different places.

Budget: How much money do you want to spend? Some lumber is more expensive than others. Be sure to choose something that fits your budget.

Appearance: Do you want your project to have a natural wood look, or are you okay with a different color or texture? Some woods are naturally beautiful, while others can be painted or stained.

Maintenance: How much work will you do to keep your project looking great? Some woods need more care than others.

Eco-Friendly: If you care about the environment, you might choose a wood harvested sustainably so you don’t harm the forests.

Choosing the right lumber for outdoor projects, like decks, treehouses, or anything else, is super important. It affects how long your project will last, how it looks, and how much work you’ll have to do to take care of it. So, think about where your project will be, your budget, how you want it to look, and how much maintenance you’re okay with.

Your outdoor projects will be strong, safe, and excellent with the right lumber. 

Now, you’re all set to go and create amazing things in your backyard!